
GROM-BT3-NIS02 Bluetooth Hands Free and A2DP car kit installation into Infiniti G37 2012
Disclaimer: We are not liable for any damages acquired during your installation process. If you are not sure in your ability to perform the installation please seek the help of the professional.
Warning: Never turn on the car before you connect all stereo wires back to the place. If you turn on the car before reconnecting back all the wires, the airbag light might go on.
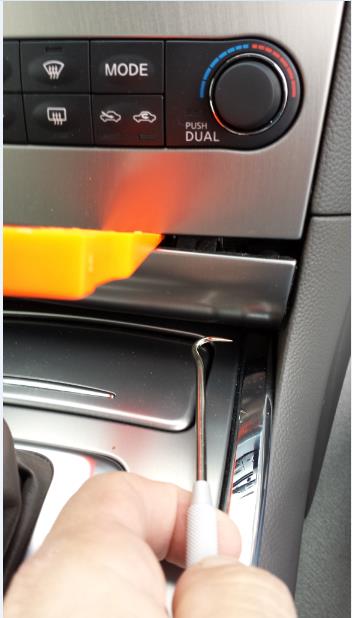
Start by removing the lower finisher plate with a non-marring interior tool and a small hook tool. If you start on one side and are firm but careful, this piece pops out:
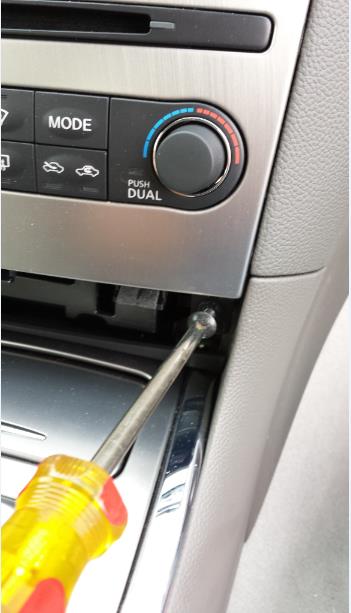
Next you remove the two screws at the bottom of the control panel, the pull from the bottom and the top un-hooks easily:
Now just carefully disconnect the four cables from the top of the control panel. Be careful to squeeze the release clips in the right place so you do not break the connectors. This goes for all connectors from this point forward.

Next, just like the control panel, remove the bottom two screws that hold the vent/control panel in at the bottom, unhook the top, and remove:
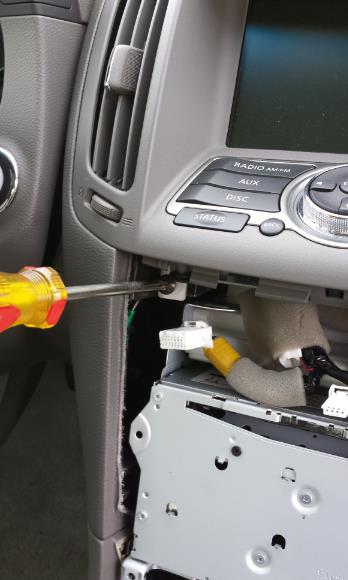
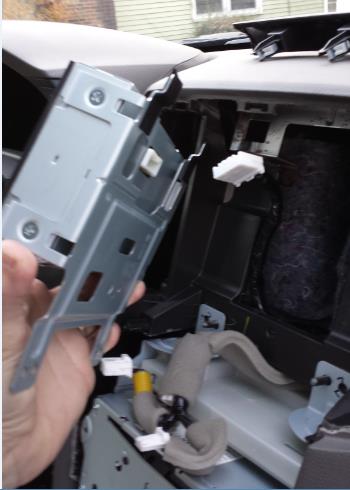
Now, remove the bottom two screws that hold in the display panel assembly:
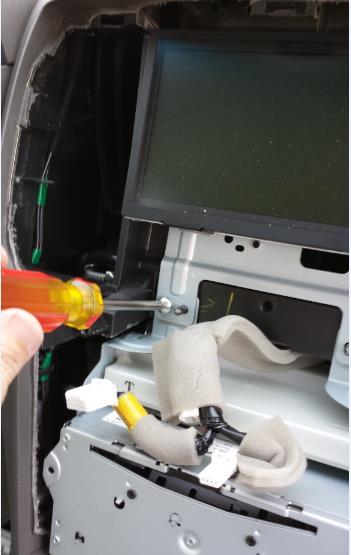
Unhook the top, disconnect the connector and remove:
Now we come to probably the trickiest part of the whole process. There are two steel screws that hold in the bottom of the A/V control unit. Getting them out was probably harder than it needed to be because I chose to NOT remove the entire center console cover where the shift **** cover is and that entire metal finished panel. If you take that out,this would probably be much easier. You can get a screwdriver in there and loosen them 98% of the way and then use a grabber tool like this one to back out the last few threads so that you can get the screws out without dropping them down into the center of the console, never to be seen again:
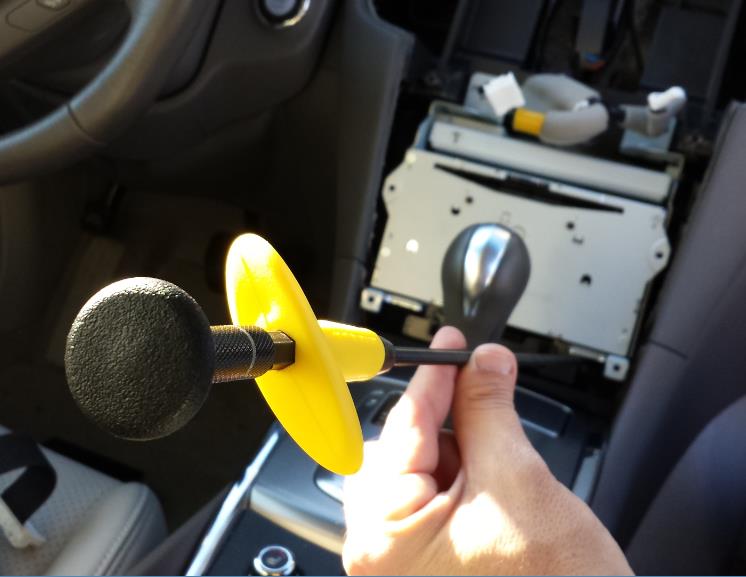
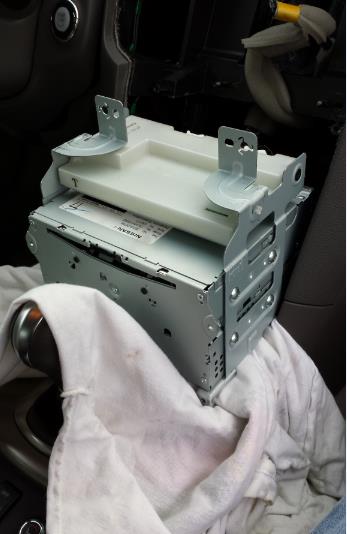
However, once you get those bottom two screws out, you can pull the unit forward and get to the back for hook up. I highly recommend you put a rag down on top of the console to protect it from the sharp metal tabs on the mounting frame:
...notice that I had to put the car in gear to get the gear shifter out of the way. Again, if I removed the shift and the center panel, this might have been easier.
I do not have pictures of the rear of the A/V receiver and the hook up process. The hook up procedure is just like GROM includes in the box… You find the “SAT” connector that fits the “NIS02” cable that comes with the box, remove the factory harness connector, plug in the GROM version, find the power wire they refer to in the procedure and tap into it. That is basically it for the wiring. One thing to mention is that the GROM procedure says do NOT reconnect the SAT harness. This was a little confusing at first because you do have a female connector on the “NIS02” harness. It looks like you are supposed to plug it back in, but the procedure said not to so I just let the two empty connectors dangle and it all worked. Naturally, as mentioned above, this GROM box basically takes the place of your factory SAT receiver. So if you have XM radio, this box will not work for you.
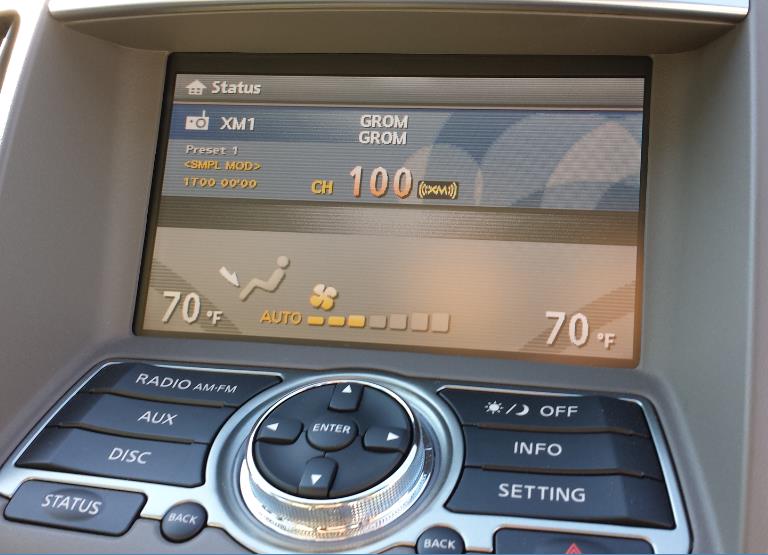
Once you hook it all up you should put the display and the control panels in loosely and test everything. I was so happy when I saw the word “GROM”appear on the screen. I am still geeking out over here!
Reassembly is essentially the reversal of disassembly. However, you will of course have to find a place to “stow” the GROM box. Interestingly enough, there is the cavity right behind the display panel which to me screamed “put your GROM box here” so I slapped a strip of weather stripping self-stick foam on the edge of it to prevent rattles and buzzes and stuffed it in:

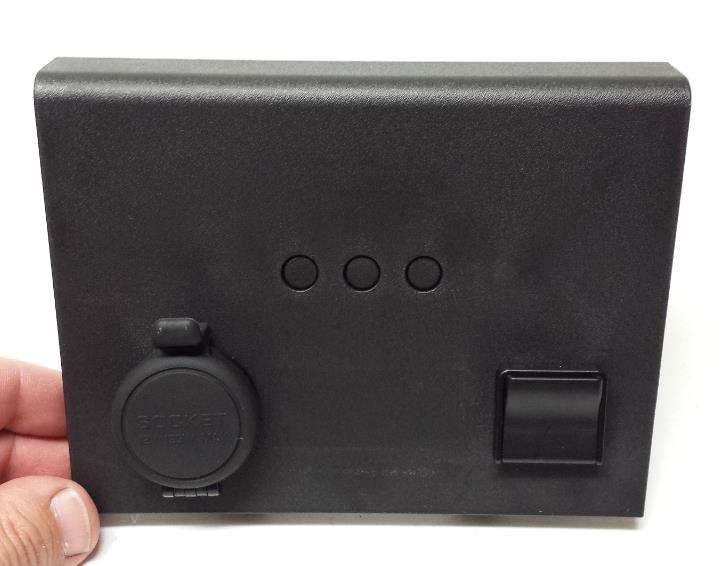
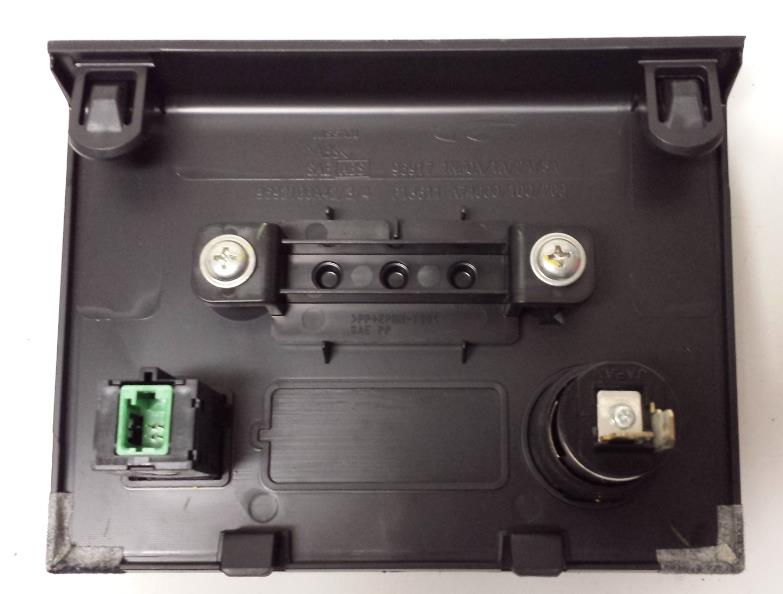
For those who are interested in the extra analog input, I chose the original factory location (the panel in the center console compartment) to install the flush mount jack:
To get this panel out, you have to wedge something under the panel and pull up on it pretty hard until it pops out. There are no screws holding it, just “pawl” clips as they call them.
There is the panel to cover the holes where the factory analog inputs used to be.
So I just removed the plug, made the center hole bigger, cut a big section out of the plug component and reinstalled it like this:
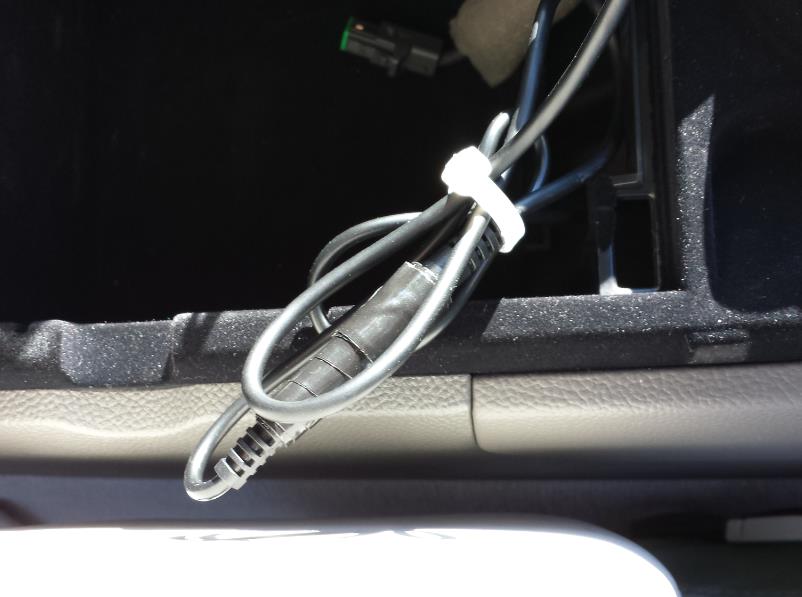
…note I installed a nylon cable tie on there in an attempt to reinforce the mount. It is pretty snug if you do not make the hole too big, but I figured I would just put it there for safe measure. Now I have this neat looking install:
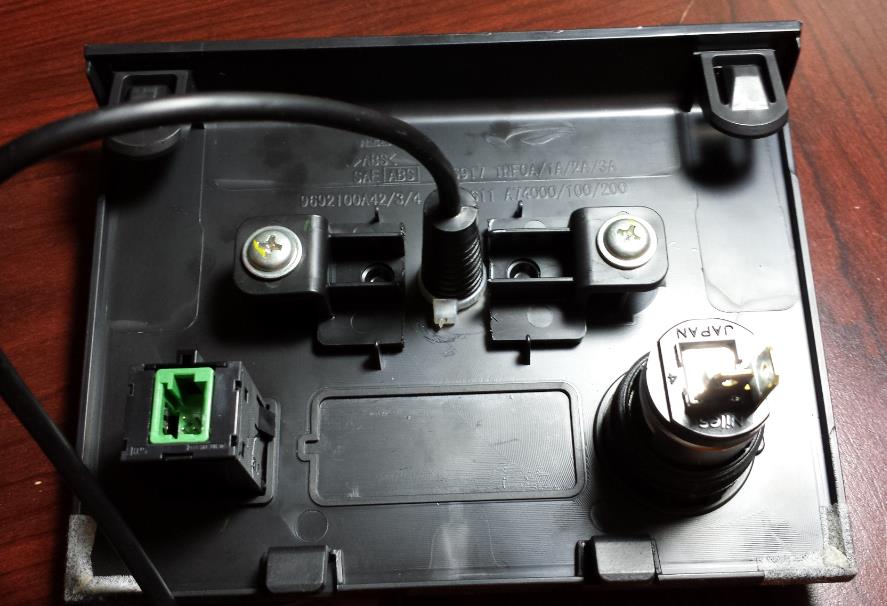
I snaked the cable through the center console from the GROM box DIN connection and connected it to the flush mount cable. I taped it with electrical tape just to make sure it does not vibrate free over time:
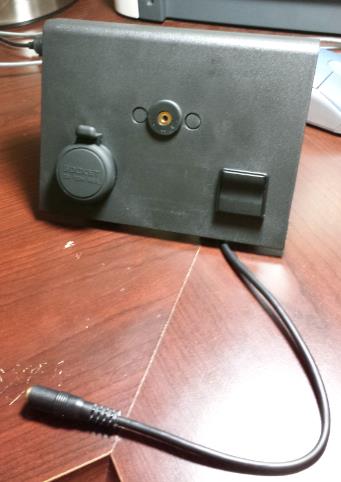
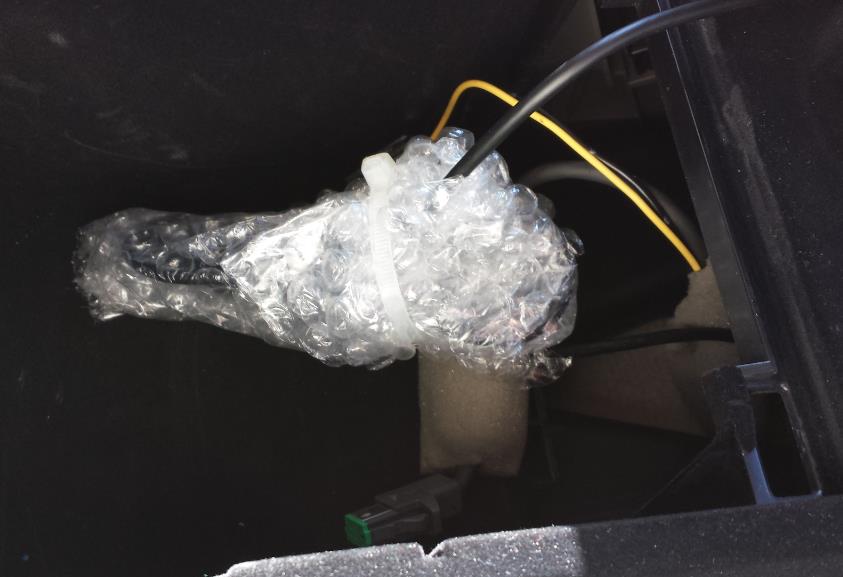
I tied up the excess cable, wrapped the whole thing in a little bubble wrap to help prevent rattles and buzzes, stuffed it back in the center console cavity, then snapped the panel back in place:
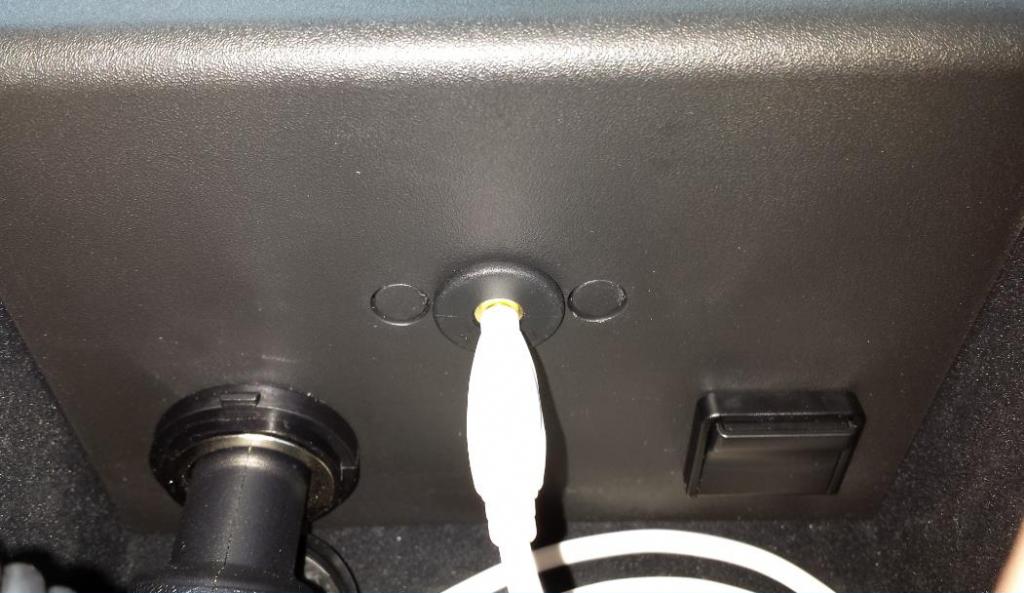
I tested it with a standard (gold plated) patch cable and it worked perfectly.
FINISHED!
Important Note: Before turning on the car make sure that you reconnected all disconnected cables back to the car. If you will not reconnect the cables before you turn on the car, the airbag light might turn on.
If airbag light went on, try the following:
To reset the light simply turn the ignition to the on position, (you do not need to start the engine.) All the lights should stay on for their diagnostic check. As soon as the airbag light goes off, before it starts flashing, immediately turn the car off. Repeat this 3 or 4 times (turning to on then off) and the light should go away. If that does not work, search around the forums… you should find some help.
Author Copyright
This article is reposted by GROM with the permission of its respective author. All original punctuation and grammar are preserved.
Author Full Disclaimer
I have documented my install process here and I must emphasize that it is MY install process which is being provided here solely for example
purposes. I am NOT responsible in ANY way if you choose to use any of my example process on your own car and: void the warranty, start
a car fire, injure yourself and/or others, and/or break your car or yourself in ANY way. It is also important to note that this GROM box
basically takes the place of your factory SAT receiver. So if you subscribe to XM radio and you use the SAT receiver in your car,
this box will not work for you.
COPYRIGHT NOTICE
All material and content are property of gromaudio.com
The material and content on this site are protected by international copyright laws.
You may not modify, duplicate, reproduce, publish, upload, transmit, or distribute in any way (including by way of email, facsimile or other electronic means) material and content from this site, unless specified, without written permission from gromaudio.com. You may download certain content or materials on specified pages from this site for personal, non-commercial use only.
All other logos, banners, and certain content not affiliated or owned by gromaudio.com is the sole property of the rightful owner.